Pages

Thursday, December 31, 2020

Sweet Ice Cream Weekend Stamp Camp!


Are you ready for some of the most adorable projects ever? Join me and some incredibly talented friends (7 Demonstrators in all!) on Saturday, January 30th and Sunday, January 31st (10:00 am PST to 3:00 pm PST each day) for a full weekend stamp camp! It will be a fabulous weekend crafting together from anywhere in Canada! PLEASE READ THE FOLLOWING DETAILS CAREFULLY!
What will you get in this Stamp camp?? Your FULL Sweet Ice Cream Stamp Camp includes:
• The Sweet Ice Cream Stamp Set and Punch Bundle as well as the coordinating DSP Designer Series Paper, Blackberry Bliss Striped Ribbon and the Ice Cream Corner Sprinkles!
• Access to an exclusive FB group where the LIVE presentations will be held all weekend (can watch later as well)!
• Make-n-takes for all 14 projects and an awesome PDF for you to follow along with while creating!
*Card stock will be prepped and ready for you with any of the punching and die-cutting done that is not using your bundle. You will provide the ink and adhesive, and punching of any parts that came in the bundle (with the card stock supplied).*
I hope you will join in the fun with us! This is the sweetest bundle ever and you’ll be amazed at the projects! It's so versatile!
Registration ENDS January 8th but, to be sure you get your order on time and avoid the risk of back orders, I encourage you to order early on Jan 5th! Make-n-take kits are estimated to ship by January 18th. They can also be picked up from my home in Coquitlam.
How do you register for the event? There are two ways to register:
Option 1. Simply head to my store early on January 5th (not before!) at https://www.stampinup.ca?hostcode=BJMZJHYZ
and purchase the Ice Cream Corner Suite #155984 or an equivalent amount of product ($75.75) if you’ve already got the suite. This link will use my Stamp Camp Host Code: BJMZJHYZ and you’ll automatically be registered for the event! If you’ve got other items you were wanting to order, you can simply throw them on your Stamp Camp order and save on some shipping! Best part is you'll also earn a FREE Sale-a-bration item since you're placing your qualifying Stamp Camp order online and it's over $60! You may order the suite anytime between Jan 5th and Jan 8th but there is a high risk of it going into back order so I encourage you to order as early as possible on the 5th, just to be safe! To be clear, you will receive the kits for 14 Make-n-Takes FREE with this option!
Option 2. Do you already own the bundle? Don't worry, there's an option for you too! *PDF/ Make-n-Take only option available ($45.00 for all 14 projects, PDF, package of Ice Cream Corner Sprinkles, 1/2 pkg of Blackberry Bliss Striped Ribbon, 1/2 pkg of Ice Cream Corner Designer Series Paper). Email me at loriwillcox@shaw.ca by Jan 4th if you’d like Option 2!

Sunday, December 20, 2020

Playful Pets Gift Bag


 I have a beautiful, loving grandpuppy named Paxton and, of course, I had to buy him some special treats for Christmas! He is a border collie with unusual colouring. Here he is after getting his certificate for “nose work” (with the help of my son, Matt)!


 Of course, I had to buy Paxton some special treats for Christmas! He LOVES fish treats and these ones from Amazon have lobster! This is a round jar just under 4" in diameter.


I was trying to figure out the best way to wrap this when it occurred to me that I could use our Playful Pets Designer Series Paper to create a gift bag! 


I had never created a square gift bag before but this one was pretty easy to figure out! I used two full sheets of 12x12 paper. I scored 1.5" down from the top of each sheet and 4" on each of the other three sides. I burnished all the folds with my bone folder.

With the sheet in front of me with the pattern I wanted on the outside of the bag, I folded the 1.5" edge at the top and glued it. I cut out the bottom left and bottom right squares along the score lines on one of the sheets of paper. On the second sheet, I just cut the horizontal score lines of those same squares but did not cut them right out. 

I then put glue on the bottom tab of the first sheet and glued it down to the same square on the other sheet. After that, it was a simple matter of putting glue on the outside of the two bottom tabs of the second sheet and adhering them inside the two sides of the bag. I then overlapped the sides of the bag and glued them together. You end up with double layers on the sides of the bag.

I punched holes and used the coordinating Playful Pets ribbon to make handles for the bag. Paxton will love it! At least, he'll love what's inside it!


Monday, December 14, 2020

West Coast Creators Blog Hop - Sand & Sea


I am thrilled to be participating in this month's blog hop with Canadian demonstrators from across the country! Don't forget to hop around to see the awesome talent of the West Coast Creators!

Today, I am sharing a sneak peek from the upcoming January - June 2021 Mini Catalogue coming Jan 5th!


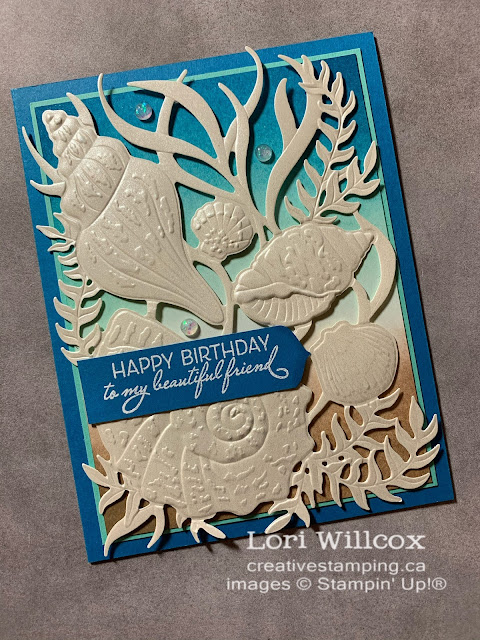
One of the coolest things about the Sand & Sea Suite, besides the coordinating stamps & dies, is that it has a coordinating 3D embossing folder! When used with the upcoming Pearlescent Specialty Paper, you get stunning results!


The background on this card was made with another upcoming product - Blending Brushes! I created a beach look by brushing and blending Crumb Cake, Coastal Cabana and Pacific Point inks. The brushes make the inks blend so beautifully!


Don't forget the inside of the card! These are some of the great stamps in the Friends Are Like Seashells Stamp Set!


I finished off the card with a sentiment stamped in Versamark on Pacific Point and heat embossed in White Stampin' Emboss Powder. The label was punched with the upcoming Treasured Tags Pick a Punch! I also added some beautiful Opal Rounds!

Check back here on Jan 5, 2021 to see a PDF of the new January - June 2021 Mini Catalogue! If you'd like your own hard copy, and you don't already have a demonstrator in Canada, please use the Contact Form on the right to request your copy from me!

BLOG HOP!


You are invited to the Inlinkz link party!

Click here to enter

Monday, December 7, 2020

Giant Year-End Sale Up to 50% Off!

Giant Year-End Closeout Event!


The Giant Year-End Closeout Sale starts December 8th! It's the perfect time to check a bunch of great creative gifts off your list, and maybe even add a little something special to your stocking, too!

You'll find deep discounts on a selection of items retiring from the August-Dec 2020 Mini Catalogue—only while supplies last.

For the best selection and deals you won't want to delay, supplies are limited and the Great Year-End Closeout Sale ends on January 4th.

SAVE 50% ON SELECT PRODUCTS


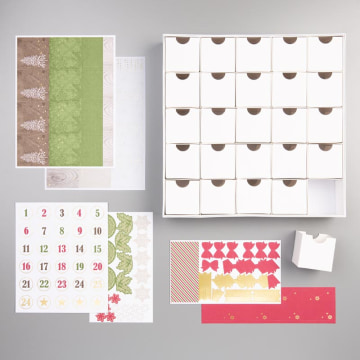
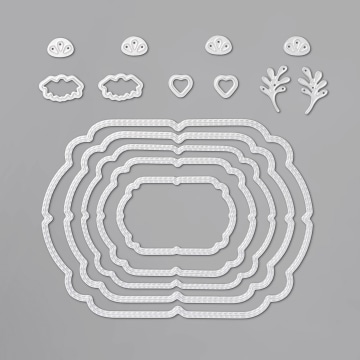
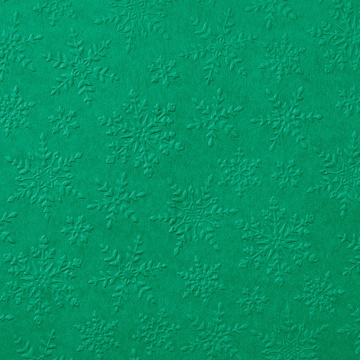
Item 150703 REGALS CHRISTMAS COUNTDOWN PROJECT KIT Item 153570 CELEBRATION LABELS DIES Item 153577 WINTER SNOW EMBOSSING FOLDER Item 153486 PLUSH POINSETTIA SPECIALTY PAPER Item 153538 WONDER OF THE SEASON MEMORIES & MORE CARD PACK Item 150444 FEELS LIKE FROST SPECIALTY DESIGNER SERIES PAPER Item 150662 GATHERED LEAVES DIES Item 150429BRIGHTLY GLEAMING SPECIALTY DESIGNER SERIES PAPER

SHOP YEAR-END CLOSEOUT SALE


When you are shopping, don't forget to check the Clearance Rack, it's been refreshed!


Saturday, November 14, 2020

West Coast Creators Blog Hop - Cherish The Season


I am so happy to be participating in this month's blog hop! Be sure to check out the creations from the other talented demonstrators below!


This card has no stamping on it! I used the dies from the Cherish The Season Bundle for the bells and the Joy die from the Peace & Joy Bundle. The bells are cut from Silver Foil and the Joy is cut from Red Foil.


I coloured the holly on the bells using Stampin' Blends. I used the gold cord from the Wonder of the Season Ribbon pack at the top of the bells and the Shaded Spruce ribbon from the same pack wrapped around the Red Velvet layer. I love the richness of this ribbon and velvet together!


Enjoy hopping to the other blogs!


You are invited to the Inlinkz link party!

Click here to enter

Monday, November 2, 2020

Tasteful Touches - Kylie's International Highlights


I am thrilled to be participating in Kylie's International Highlights this month with Stampin' Up! Demonstrators from around the world! Be sure to vote for your favourites!


Do you have some Stampin' Mist stamp cleaner that you haven't been using much since the awesome Simply Shammy came out? Put some in a Water Painter and use it to lighten your stamped images! It's almost like bleach but not as strong and safer for your stamps!

For this card, I used the Tasteful Touches stamp set along with See The Good for the sentiment. I started with Shimmery White Cardstock and stamped the flower in Memento Tuxedo Black in the bottom left corner. I stamped the branches as shown and another flower on a separate scrap of Shimmery White.


I punched a 2" Circle out of a Post-It Note to use as a mask and then used Sponge Brayers to sponge Mango Melody (top) and Melon Mambo (bottom) inks over the whole layer, and Melon Mambo on the scrap with the flower. I then used Stampin' Mist in a Water Painter to "paint" the flowers. The Stampin' Mist lightens the ink! You can use as much or as little as you'd like. I then used a wedge of a Stamping Sponge to add some Mango Melody in the center of the flowers, and again used the Water Painter to lighten. 

The second flower was fussy cut and added to the layer with Stampin' Dimensionals.


I stamped the sentiment in Versamark on Basic Black Cardstock and heat embossed it with White Stampin' Emboss Powder. I then fussy cut it and glued it to the card front. I added 3 Champagne Rhinestones. 

The layer was mounted on Basic Black and then on a Melon Mambo card base.


Monday, October 26, 2020

Quite Curvy - Kylie's Top Ten Winners


 I was so excited to come in first place in Kylie's International Highlights! Thank you all who voted for my Northern Lights card! Now I have the privilege of participating in Kylie's Top Ten Winners Blog Hop!


Today, I've used the Quite Curvy Bundle which will be available to purchase on Nov 3, 2020!
I can't get enough of these curvy dies and sentiments, 

I added my own sunset scene on Shimmery White Cardstock using a 1-1/2" Circle Punch to create a Post-It note mask for the sun. Using a wedge of our Stamping Sponges, I sponged Daffodil Delight, Mango Melody, Pumpkin Pie and Melon Mambo for the sky and, using another Post-It note to mask off the sky, i sponged Balmy Blue for the ocean. I also used a Stampin' Chalk Marker to add waves. The little birds are from the Mountain Air stamp set and are stamped in Memento Tuxedo Black ink. 


The card base was die cut in Basic Black using the Curvy Dies. The "thanks" was die cut from Melon Mambo using the Well Written Dies and I coated it with Shimmery Crystal Effects.


The top sentiment is from the Quite Curvy stamp set. It was stamped in Versamark Ink and heat embossed with White Stampin' Emboss Powder. I dotted the "i" with a Rhinestone Basic Jewel.

Please enjoy hopping to see the wonderful projects from the other winners!

BLOG HOP LIST


Wednesday, October 14, 2020

West Coast Creators Blog Hop - Curvy Snowflakes


I'm happy to be participating in the West Coast Creators Blog Hop this month!
My card features a sneak peek of an upcoming bundle called the Quite Curvy Variety Bundle which will be available to customers from Nov 3, 2020 through Jan 4, 2021!


The dies that I used were from the So Many Snowflakes Dies and the Curvy Dies. I also used Snowflake Splendor Designer Series Paper (DSP). Two snowflakes were actually cut right out of the DSP with the third, smallest one being cut from Pacific Point cardstock. 


The Pool Party layer was embossed with the Winter Snow Embossing Folder and the three snowflakes were layered together and topped off with a Blue Adhesive-Backed Gem.

The sentiment is from the new Curvy Christmas Photopolymer Stamp Set and was stamped in Pacific Point ink on Whisper White cardstock. The card base is Whisper White Thick cardstock.

Please enjoy hopping to see some wonderful cards from some other West Coast Creators!

You are invited to the Inlinkz link party!

Click here to enter
.


Monday, October 5, 2020

Northern Lights - Kylie's International Highlights


I am very excited to be participating in Kylie's International Blog Highlights this month with Stampin' Up! Demonstrators from all over the world!

I will never forget the one and only time I saw the Northern Lights. I was in my early 20's and living in Edmonton, Alberta, Canada at the time. I could hear the neighbours outside and they sounded very excited! I went outside and could not believe my eyes! I had never heard of the Northern Lights, aka Aurora Borealis, and was completely blown away! 

This card shows the beautiful shade of green I saw in the sky (as well as I can remember)!


Believe it or not, I only used one ink colour to create the sky! I used a wedge of a Stamping Sponge to apply Night of Navy Ink in a circular motion onto Pear Pizzazz cardstock (5" x 3-3/4"), leaving some of the cardstock colour peeking through to create the Northern Lights.


The tree comes from the Most Wonderful Time stamp set which is part of the Most Wonderful Time Product Medley. I stamped it multiple times, sometimes full strength, sometimes stamped off, in both Mossy Meadow and Night of Navy inks. 

I matted that layer onto another Pear Pizzazz layer (5-1/8" x 3- 7/8").


The gold metallic trim comes from the Forever Greenery Trim Combo Pack. I wrapped one piece around the layer and adhered it in the back. Then I created a little bow and attached it with a Mini Glue Dot. 

The "thanks" sentiment comes from the Well Written Dies. It was cut from the lightest colour (gold) of Brushed Metallic Cardstock.

The whole card front was adhered to a Night of Navy card base (8-1/2" x 5-1/2", scored at 4-1/4").

I added some stars with a Stampin' Chalk Marker and I topped it off with 3 Rhinestone Basic Jewels in the sky!


Product List